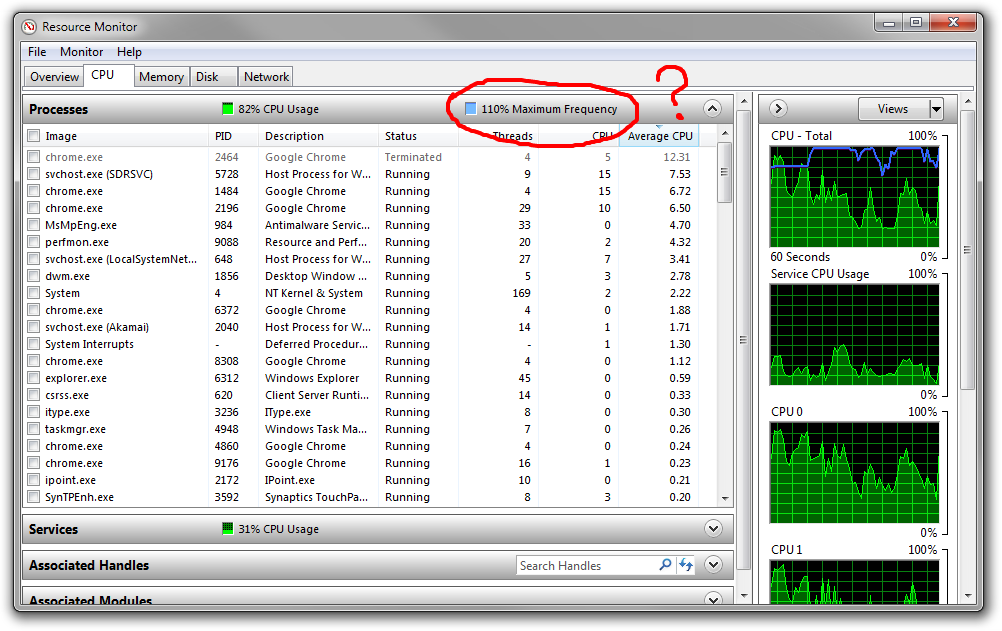
A computer needs a CPU where it can perform complex tasks at an incredible speed. How fast the program loads depends on the CPU speed. You can find the current speed of your computer by going to the resource monitoring tab on your computer. But if you’ve ever played around in your PC’s Resource Monitoring CPU tab, you’ve seen a status box and a graph that shows the maximum frequency. So, what does CPU maximum frequency mean?
The number of cores on a CPU can also affect the maximum frequency of a PC. If your computer is running at maximum frequency, it can be both beneficial and detrimental to your computer’s health. Learn more about the maximum CPU frequency of a PC.
How to increase and decrease maximum CPU frequency
When you want to use your PC at its maximum frequency, there are things you need to know. For example, when gaming or running resource-intensive programs, having your CPU work at its peak can help ensure that the experience with the program is smooth. Reserving resources during these times will simply cause the program to lag or not perform optimally.
Sadly, using your CPU at its maximum frequency can quickly cause heat buildup. And when used for a prolonged time, significantly, when the fan is not functioning effectively can damage your CPU. For this reason, you need to know how to increase or reduce the CPU maximum frequency when necessary depending on the tasks you want to perform.
Method #1: Boost it with Turbo Boost
Turbo Boosting is a feature that makes your processor cores run faster. However, doing so requires high power consumption and causes the processor temperature to rise. Enabling Turbo Boost is only available on select Intel and AMD processors. So, if your processor doesn’t support Turbo Boost, then there is no way you can boost your CPU frequency beyond what is indicated on the PC.
With a few tweaks in the command prompt though, you should be able to get your processor, even if it doesn’t support Turbo Boost, to run consistently at the maximum frequency.
Here’s how to enable Turbo Boost on a Windows PC.
- Reboot your laptop and press F9 repeatedly to enter the “System Utility” screen.
- In the “System Utility” screen, tap the “System Configuration” tab and click BIOS Platform Configuration Settings.
- Tap on “Performance Option” and select “Turbo Boosting Technology” from the option.
- Toggle the switch to enable Turbo Boosting technology, and then press F10 to save and exit the “System Utility” screen.
Method #2: Reduce it with Power Saver Mode
The benefits of lowering the CPU maximum frequency are numerous. If your CPU runs at maximum frequency for long periods of time, it can cause your computer to overheat. Unless you have a specific use for your PC to run at such capacity, you should only reduce your PC’s processing power to what you need. For example, when the CPU frequency is at the desired level, your PC will not overheat, power consumption will be optimal, and it will protect the overall health of your computer.
Here’s how to reduce CPU max frequency with Power Saver Mode.
- On a Windows 10 PC, tap the Windows icon at the bottom left of your screen, scroll down and click the Settings app.
- Tap on “System”, and from the left panel, tap on “Battery”.
- Toggle the “Battery Saver” switch to enable Battery Saver.
- Click on the “Battery Settings” option, then scroll down to the “Battery Saver” section and tap the checkbox to disable the
- “Automatically turn on battery saver when the battery is low” option.
Final Thought:
Ideally, the CPU processes tasks very quickly even though the default CPU frequency is not at maximum. So, the CPU frequency should not be maxed out, unless you are doing something resource intensive. Even if your computer clocks this maximum frequency, it should only be there for a moment, after which it should drop.