Your CPU fan is an integral part of your computer that ensures that the internals of your computer do not overheat. Since it is an integral part of your computer, it is very important to get it right. Not all CPU fans are the same. They differ in size and speed measured in RPM. So, what is a good RPM for a CPU fan?
A CPU fan may not be the most expensive component in a PC build, but it will help keep your PC at optimal temperatures. So, in this article, we will discuss how to check the RPM of your CPU fan, among other things.
The Central Processing Unit (CPU) fan is a crucial component of any computer system, responsible for keeping the processor cool during operation. Finding the ideal RPM (Revolutions Per Minute) setting for your CPU fan is essential for maintaining a balance between performance, temperature management, and noise levels. Let’s explore how to determine and set the right RPM for your CPU fan in a step-by-step manner.
Step 1: Understand Your CPU
Before adjusting your CPU fan’s RPM, it’s vital to understand your processor’s specifications. Different CPUs have varying thermal requirements and tolerances. High-performance CPUs, such as those used for gaming or intensive tasks, typically generate more heat and may require higher RPM settings for adequate cooling.
Step 2: Use Monitoring Software
Utilize monitoring software to assess your CPU’s temperature and fan speed. Programs like Core Temp, HWMonitor, or SpeedFan provide real-time data on your CPU’s temperature and fan RPM. Monitor these values during different usage scenarios—idle, browsing, gaming, or heavy processing—to understand temperature fluctuations and the corresponding fan speed changes.
Step 3: Balance Performance and Noise
Determining the optimal RPM involves finding a balance between performance and noise. Higher RPMs effectively cool the CPU but can lead to increased noise levels. Lower RPMs reduce noise but may compromise cooling efficiency. Experiment with different RPM settings to strike a balance that maintains an acceptable temperature while keeping noise levels within your comfort zone.
Step 4: Access BIOS/UEFI Settings
Access your computer’s BIOS (or UEFI) settings to adjust the CPU fan’s RPM. Reboot your computer and press the designated key during startup (often displayed on-screen) to access the BIOS menu. Navigate to the hardware or fan settings section where you can modify fan speed control.
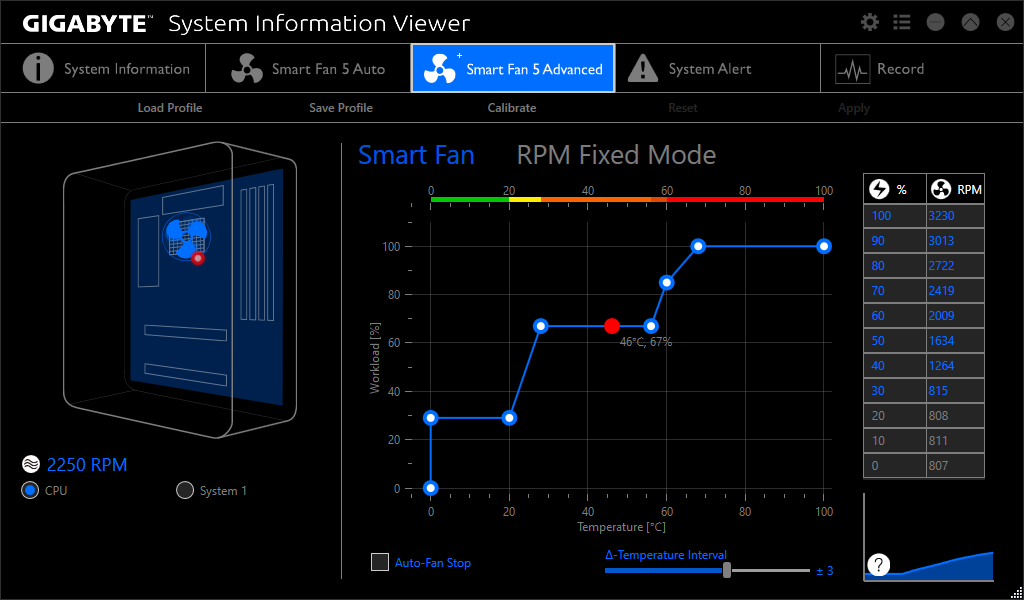
Step 5: Adjust Fan Curve
Many modern motherboards offer fan curve settings, allowing you to customize the fan speed based on temperature thresholds. This feature lets you set specific RPMs for various temperature ranges. Create a fan curve that gradually increases fan speed as the temperature rises, ensuring efficient cooling without excessive noise during lower temperatures.
Step 6: Stress Test and Monitor
After adjusting the settings, stress test your CPU to observe how the fan responds under heavy load. Tools like Prime95 or AIDA64 can push your CPU to its limits, allowing you to monitor temperature changes and fan speed adjustments in real-time. Ensure the fan effectively manages temperature spikes without reaching critical levels.
Step 7: Fine-Tuning
Fine-tune your settings based on the stress test results. If the CPU temperature remains within safe limits but the fan noise is bothersome, consider slightly lowering the RPM or adjusting the fan curve to prioritize quieter operation without compromising cooling performance.
Step 8: Regular Maintenance
Keep an eye on your CPU’s temperature and fan performance periodically. Dust buildup can impede airflow, reducing the fan’s effectiveness. Regularly clean your computer’s internal components to maintain optimal cooling efficiency.
Final Thought:
Finding the optimal RPM for your CPU fan involves a process of trial and observation. By understanding your CPU’s requirements, balancing performance and noise, and using monitoring tools, you can fine-tune your fan settings to ensure efficient cooling while minimizing noise levels, thereby optimizing your computer’s performance and longevity.